DocRob
Members
-
Joined
-
Last visited
-
Thank you Paddy, I really like that effect, it looks more realistic, than completely saturated paint . Easy here, where the complete engine is made from white metal parts. When there is a mix of resin and metal, I underlay a metallic base coat, like flat aluminum or other. Cheers Rob
-
Looking great Kevin, tons of detail to look at. Cheers Rob
-
Should be a nice display piece Carl. Sotheby´s sold a 412T2 Engine for 38500€ and left a nice reference picture. Cheers Rob
-
Figures came out great Mike, yo can almost feel that sweater scratch. Cheers Rob
-
Sailor reports on board, Paddy. Shame with bulkhead fit. I will peep over your shoulder, as I have the same kit with the big Pontos set. I will add Ion figures to mine. Other than you, I built a few ships over the decades, but only one recently. It was the USS Arizone in 1/350 and you are right about needing to adjust to small scales. When I was a teenager, I built the 1/72 Matchbox Flower Class Corvette and equipped a RC set, but these were different times and different quality standards. If you like venturing into ships, you should also try a wooden sailing boat. I built Vanguards Duchess of Kingston as my first and enjoyed the build immensly. I stalled with the rigging though, which waits for me to finish it. If PE ladders or railings are to flat for your liking, you could cover them carefully with CA or PVA glue. After curing they look a bit more 3D. Cheers Rob
-
Thank you FA, I use mostly Colle 21 CA glue and sometimes Tamiya craft glue, which is white glue, mostly for PE parts, which sit flat on a surface. Cheers Rob
-
Engines are always a great joy to build with MFH kits. They are delicate and consist of many parts, but usually they go together very well. Care has to be taken, that all parts sit flush, not always easy to see, with black on black parts. A milimeter too high may have serious consequences later. I added some more sub- assemblies to the engine, like water pump, etc. and build up the inside of the airbox with the delicate spark plugs and ignition wiring. I decidded to paint the sockets of the spark plugs red (it´s a Ferrari), but some pictures show them yellow. Unfortunately, all the detail will be covered by the huge carbon air intake, which I hope will be removable finally. Too enhance detail on the engine parts, I use a toothpick and blade, to scratch away black paint on screw heads and metal belts, which looks better than brush painted details. Cheers Rob


-
I continued with the engine and added numerous rivets, the clutch and some other components. The box around the intakes and ignition needs to be covered with heat protective foil. This self adhesive embossed foil needs to be cut out with a sharp blade, using provided paper templates. I have some decal applicators with different shaped rubber heads, which really helped to wrap the foil around the finer details of the box. Into the box, the air intakes and ignition system will be installed. You need to glue a round PE disc onto the base and then add the turned aluminum funnel. To make alignment easier, I used Tamiya craft glue, which is possibly usual whit glue, but with a very finy applicator tip. This glue allowed to move the PE discs into place properly. The funnels are glued on top of these with CA glue. Cheers Rob


-
While browsing the MFH-site recently, I found out, that they produce the dotted white lines as a separate decal, which will be helpful, if you plan to paint both body colors, instead of using the provided decals. NEW LINE DECAL for 1/12scale 787B Cheers Rob
-
Nice one. The C11 was released by MFH in 2020, maybe you can find one second hand. Cheers Rob
-
The C1 Corvette is older than me, wich definitely qualifies as old . I read about your solution with the rear cover hinges and stored it on my brain HD. The Corvette seems to be one of the not so good MFH kits, when I understand some build logs right, but I like the look and it will find a nice place in my shelf besides the Cobra Coupe. Cheers Rob
-
Thank you Nick, are you talking about the 917? I thought about that one too, but I´m not much of a Porsche guy. Cheers Rob
-
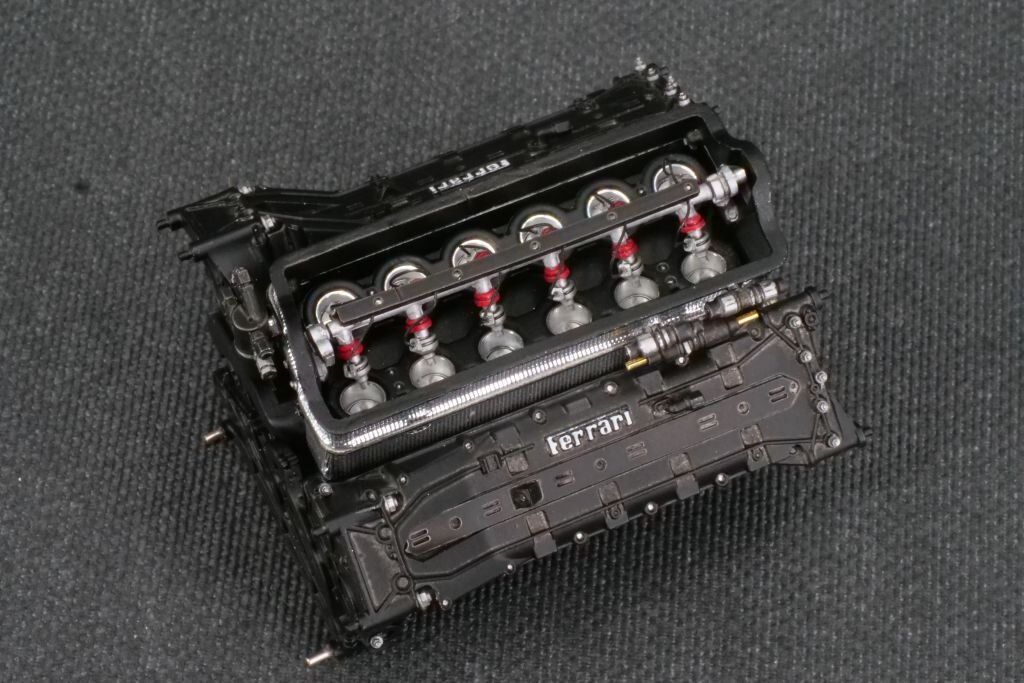
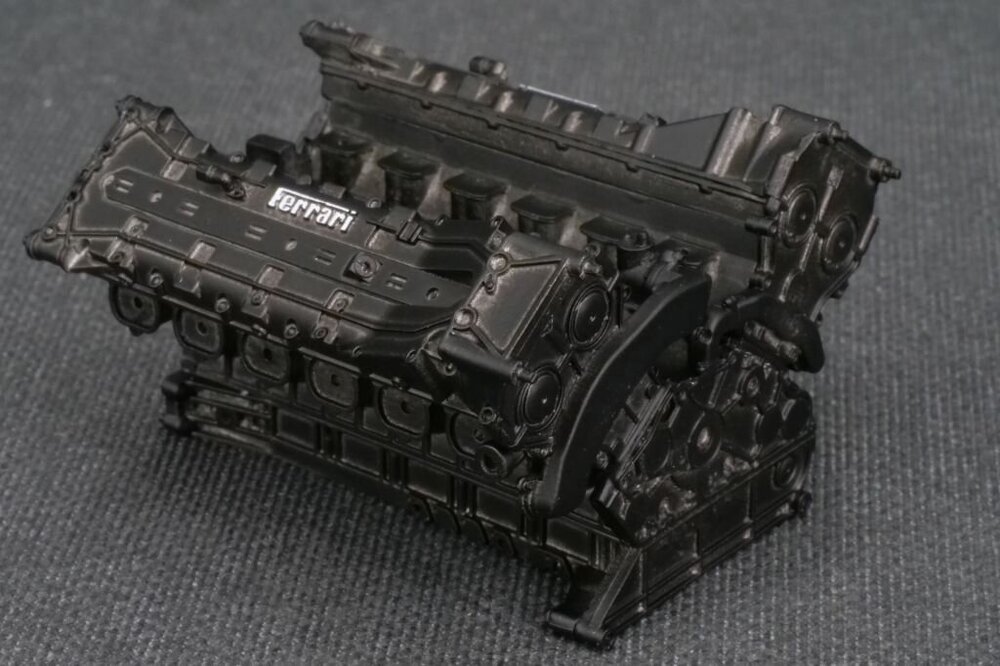
The engine and all other surrounding subassemblies got airbrushed in my signature spray variant. Therefore, I use Tamiya LP-5 semi matte black highly dilluted with leveling thinner and spray carefully over the parts, to hinder the very thin paint to run. The idea is to let the metal shine through for a tiny bit. It´s an effect, similar to drybrushing, but more regular and gives the painted parts a more realistic metal look. In reality, you mostly can visualize materials from their looks. You can see, what is plastic, metal or wood only by the shininess, reflections, color depth and surface characteristics. With a scale replica, you have to use airbrushing or painting techniques to simulate this. The effect might look a bit crude on the picture, but this will change while adding the subassemblies and wiring. The Ferrari lettering was painted, using a white ball roller pen, which I used for the first time and I like the result. It dries matte and will also be helpful to paint brand logos on tyres. Cheers Rob
-
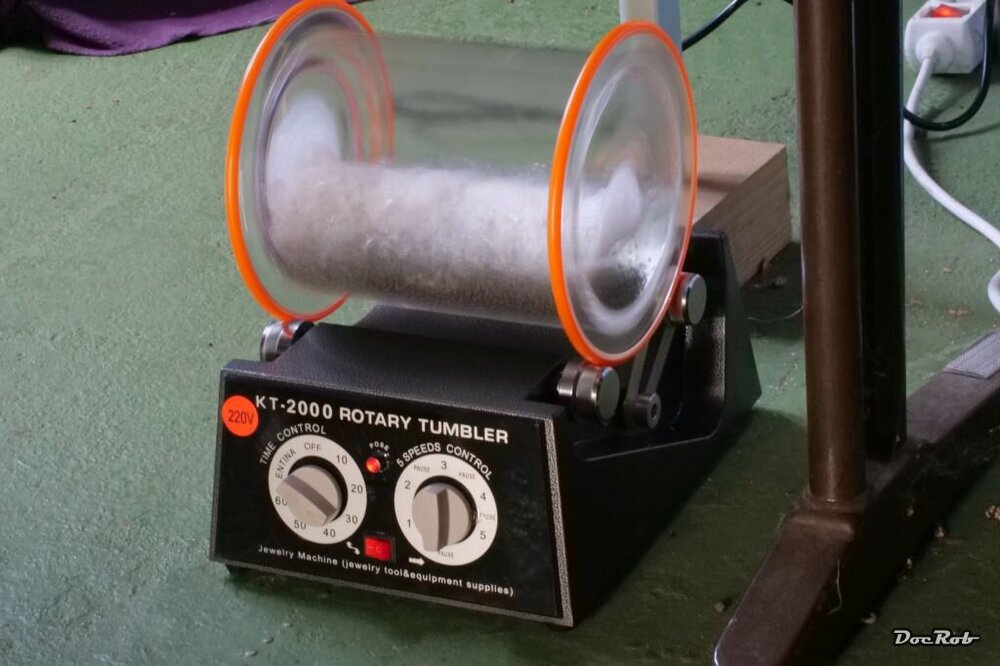
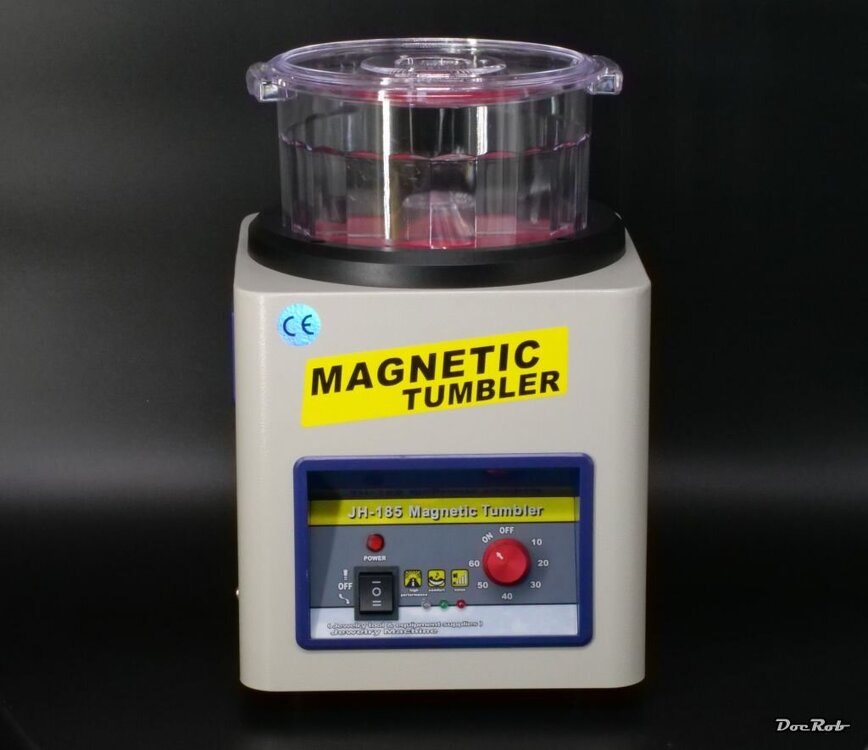
You are right about the moving parts like doors, etc., F1 cars are a bit easier to build this way, but they have their own challenges. Everything is cramped into a tight body and suspensions are usually complex and delicate and the wings as well. I ordered the Abarth, so some more doors and bonnets , but I like the open topped sports cars, because you can also see the interior very clear. I also pre-ordered the Le Mans Corvette C1. At first, I thought, I could withstand, but I thought often about getting the street version. I didn´t like the wheels and look of the engine too much though. The Le Mans C1 looks better to my eye, less chrome, dark magnesium wheels, somehow badass cool. I cleaned all my past MFH kit metal parts with a magnetic tumbler. I use 0,3 mm steel needles for the cleaning together with soapy water. I tumble the parts for 30-60 minutes, rinse them under clear water and let them dry. The needle treatment leads to only minimal loss of detail and enhances the shinyness of the white metal. I also have the feeling thea due to the needle hammering, the surfaces are a bit harder. For the Ferrari, I didn´t clean the white metal parts at all, as they looked good and there are no unpainted or polished parts. Initially, I tried another tumbler for my first MFH build, the Crocker. It uses metal balls for cleaning. The shinyness is fantastic, but complicated shapes are only treated on the surfaces not the crevices or around protruding parts, which lead me to buy the magnetic tumbler. Cheers rob
-
A complete Eagle fleet on your desk, ready to explore the moon, nice. Cheers Rob